What are import maps
Import maps is a browser proposal that allow web pages to control the behavior of JavaScript imports, in other words control over what URLs get fetched by JavaScript import statements and import() expressions.
A NodeJs developer is used to import packages this way
import { html } from 'lit-element';
If we tried to do that directly in the browser it will fail, throwing an error similar to
Uncaught TypeError: Failed to resolve module specifier "lit-element". Relative references must start with either "/", "./", or "../".
This is happens because the specified path (‘lit-element’) is ‘bare’, meaning that is not the full path to the file where the source code of that object is.
There is also the problem that if we gave the full path of the file, that file could also be importing another package in the same way, with a bare path.
The typical workaround for this problem is to use a bundler like Rollup or Webpack that resolves all of the paths. And puts all of the required code into one single file.
There is the exception of packages that have zero dependencies (meaning that they simply do not import from another packages), they do things like relative imports, for example,import { defaultTemplateProcessor } from './lib/default-template-processor.js'; or have the so called “dist” files which have all of the required code in one single file.
In those cases we could do something like import { foo } from './node_modules/lib-foo/file.js' there will be no problems
But what if we wanted to still use the bare paths syntax, since is better and more comfortable to work with and have something that tells that a bare path points to a full path. That’s exactly what import maps does!
Quoting from the specification on chromestatus
" Until import maps, the web has had no native ability to do this kind of mapping (although the specification has included a carveout for it since modules were first introduced). Import maps bring this ability to the web’s native module system, putting it on parity with web developer expectations. "
Using import maps
Currently import maps are a experimental feature, the only browser that has implemented it is google-chrome, so, to start using them we have two methods
- Enable import maps on google-chrome by putting in the address bar the url
chrome://flags/, then search for import maps in the search bar and enable the flag “Experimental Productivity Features”.
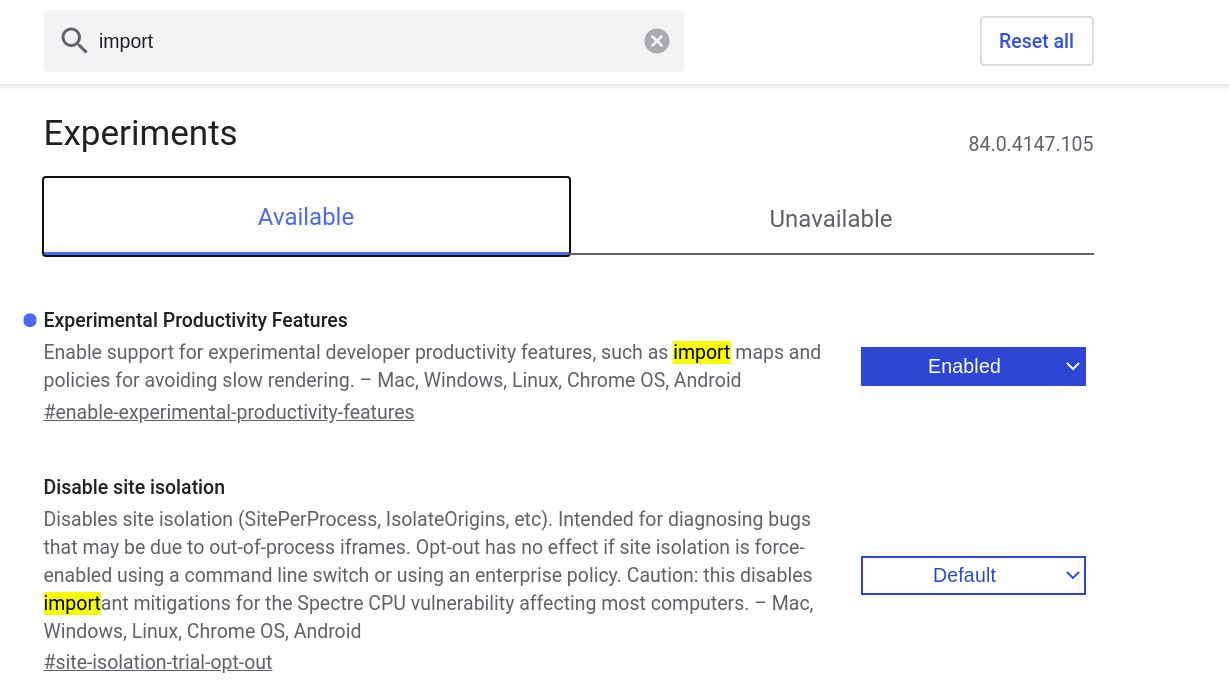
Chrome flag Experimental Productivity Features
- Use a polyfill, in this moment there are two, es-module-shims and SystemJS for the following example I’ll be using the first one.
Let’s begin setting up the example by installing the required dependencies
es-dev-serverwe are going to need a server because the polyfill uses the fetch api.es-module-shimsthe polyfill that’s going to do the import magiclit-elementthe dependency that uses the npm system
Install the dependencies with yarn only, we’ll need the generated yarn.lock file for later.
yarn add es-dev-server -D
yarn add es-module-shims lit-element
Then we are going to craft the html file which will have the import map and the javascript code that uses imports with the bare syntax
Make an html file that requires the lit-html dependency
| |
Next serve the html file
npx es-dev-server --app-index index.html --watch --open

Index page with custom button
Let’s explain some things about the example.
We are making a simple web component with LitElement base class.
The import map makes the bare path in line 25 to be resolved to
import { LitElement, html, css } from './node_modules/lit-element/lit-element.js';. It does the same for the internal imports oflit-element.If you are using chrome with the enabled flag “Experimental Productivity Features”. You don’t need line 6, change line 11 to
<script type="importmap"></script>and line 23 to<script type="module"></script>.
There is still one thing you might be asking. How did you know how to list those other imports ? If you are only importing lit-element. Well that’s one thing we have to take care about, the internal imports of lit-element, doing this by hand might be a huge pain, the import map you see above took me a few minutes to setup, I’ve had to analyze the package.json of lit-element and lit-html since the first one is dependent on the last one. Even the import map that I’ve provided could fail for others imports of lit-html.
So the ideal is to have something more robust, a tool that automatically generates the import map for ourselves.
Generating import maps
We’ll use the package @import-maps/generate
to generate the import map. The caveats are that it only supports yarn.lock file ( this is why the dependencies must have be installed only with yarn at the beginning ) and that Windows paths are not supported.
Install @import-maps/generate as a development dependency
yarn add @import-maps/generate -D
To generate the import map run the command
npx @import-map/generate
This will output the importmap in a file named import-map.json, below is an example
{
  "imports": {
    "es-module-shims/": "/node_modules/es-module-shims/dist/",
    "lit-element": "/node_modules/lit-element/lit-element.js",
    "lit-element/": "/node_modules/lit-element/",
    "lit-html": "/node_modules/lit-html/lit-html.js",
    "lit-html/": "/node_modules/lit-html/"
  }
}
Ideally you’ll want to generate the import map after installing any additional dependency, to do so add to package.json a post install script
"scripts": {
  "postinstall": "generate-import-map"
}
Lastly include the import map by replacing line 11 on the index.html file used before.
<!-- index.html -->
<html>
  <head>
    <title>ES Import Maps Shim</title>
    <script defer src="./node_modules/es-module-shims/dist/es-module-shims.min.js"></script>

    <!-- Generated import map -->
    <script type="importmap-shim" src="import-map.json"></script>
    <!-- ... -->

  </head>
  <body>
    <custom-button></custom-button>
  </body>
</html>
The problem of NodeJs packages
Some NodeJs packages might not be compatible with the browser, back before the import/export (ESM modules) syntax, require() (CommonJS) was used instead. There is a chance that some package uses a dependency that uses the old syntax making it unusable in the browser since it only understands import/export. The solution to the problem would be to simply convert the old syntax to the new one, there is a tool that does that automatically Snowpack
, the next example is about it.
The reason why I choose the lit-element package was because it’s ESM ready, thus avoiding the problem described above.
For the example that covers this topic will continue using web components, instead of making one we will download the paper-button from @polymer
. The characteristic of this is that it’s not declared as an ESM module. If you inspect the node_modules/@polymer/paper-button/package.json it has no “module” field, even do the file main file uses import syntax.
Running the generator from the last example, will trow an exception
(node:10621) UnhandledPromiseRejectionWarning: Error: Cannot find module '@polymer/iron-behaviors'
I’ve inspect the package.json of ‘iron-behaviors’ and didn’t find the “main” field. Which is probably what’s causing problems.
Back to Snowpack, it acts as a middleware or intermediary between the dependencies stored in the node_modules folder and the web browser making these fully compatible. Takes as input a .js file declared as main in package.json, analyzes the declared imports and outputs a web_modules folder with bundled javascript files and the respective import map.
To start the example install snowpack
yarn add snowpack -D
And the component
yarn add @polymer/paper-button
Create a new snowpack.html file
<!-- snowpack.html -->
<html>
  <head>
    <title>Import Maps with Snowpack</title>

    <script defer src="./node_modules/es-module-shims/dist/es-module-shims.min.js"></script>

    <!-- Import map is located in the web_modules folder -->
    <script type="importmap-shim" src="./web_modules/import-map.json"></script>

    <script type="module-shim" src="main.js"></script>
  </head>

  <body>
    <paper-button raised>Another Button</paper-button>
  </body>
Create main.js file, inside this file import the paper-button
import '@polymer/paper-button/paper-button.js';
Update your package.json main field
{
  "main": "main.js"
}
Run the command to generate the web_modules folder
npx snowpack
If you inspect the web_modules folder there is one single js file per dependency
web_modules/
├── import-map.json
├── lit-element.js
└── @polymer
    └── paper-button
        └── paper-button.js
If some of the dependencies share a common dependency they will be put in a common folder.
Like the last generator you’ll want to update the import-map.json every time a dependency is added, to do so, add to package.json a postinstall script.
"scripts": {
  "postinstall": "snowpack"
}
Run the server
npx es-dev-server --app-index snowpack.html --watch --open
You should see a blank page with a button

Snowpack page with paper button
Heritage a package manager for modern web development
We have seen some of the problems related to node packages and how to fix them, the proposed solution required to use snowpack to act as a middleware and convert those packages to ESM modules to be used in the browser, the conversion outputted a web_modules folder which is a shallow copy of node_modules, you might find this a problem when the number of dependencies grow, since there will be code duplication.
But hey, what happens if you are a person that lives on the edge an only installs ESM ready dependencies and even don’t like to much the node_modules folder because is heavy on disk usage, then it wouldn’t make sense to use snowpack. You could rely on a content delivery network like unpkg to import packages and then craft an import map that points to unpkg url’s, for example
{
  "imports": {
    "lit-html": "https://unpkg.com/lit-html@latest/lit-html.js?module",
    "lit-element": "https://unpkg.com/lit-element@latest/lit-element.js?module",
    "lit-html/lit-html.js": "https://unpkg.com/lit-html@latest/lit-html.js?module",
    "lit-html/lib/shady-render.js": "https://unpkg.com/lit-html@latest/lib/shady-render.js?module"
  }
}
This approach looks OK, but there is something that downgrades the development experience, every time when the web page is initially served by a static server, for example, the one we been using es-dev-server it will have to make a request to the unpkg servers to get those js files, this is something that I don’t personally like since my Internet is slow, what I would like is to make the request once and get those files stored in the disk, something similar of what Deno
does to “cache” it’s dependencies.
Heritage
is a package manager for the web based on the WICG/import-maps
specification, it only have two dependencies acorn and node-fetch. Heritage installs node packages is a special way, it downloads them by default from Pika and Unpkg registries and puts them in a folder named web_modules similar to snowpack. The obvious difference here is that it doesn’t need to have a node_modules folder, and for me it’s a big plus.
Let’s see an example similar to the others where we install two ESM ready packages lit-element and @lit-element-bootstrap/button with heritage. Since heritage generates a web_modules folder this will conflict with the previous setup.
Create a new folder
mkdir heritage
cd heritage
Install heritage
yarn add -D @eliaspourquoi/heritage
Installing dependencies with heritage is similar to yarn
npx heritage add lit-element @lit-element-bootstrap/button
What heritage will do is to use the package.json to register required packages under the webDependencies field, exactly like Snowpack before version 2. The lock file is the generated import-map.json used to manage imports by the browser.
Check the package.json
"webDependencies": {
  "lit-element": "2.3.1",
  "@lit-element-bootstrap/button": "1.0.0"
}
One minor problem here, installing es-module-shims with heritage trowed an exception, so I’ll have to install it with yarn.
yarn add es-module-shims
Install the server
yarn add es-dev-server -D
Use installed packages
<!-- heritage.html -->
<html>
  <head>
    <title>Heritage</title>
    <!-- Include the polyfill -->
    <script defer src="./node_modules/es-module-shims/dist/es-module-shims.min.js"></script>

    <!-- Include the import map generated by heritage -->
    <script type="importmap-shim" src="web_modules/import-map.json"></script>

    <!-- Make a custom button, and use the downloaded web component -->
    <script type="module-shim">

      import { BsButton, BsButtonDarkCss } from '@lit-element-bootstrap/button';
      import { LitElement, html, css } from 'lit-element';

      class CustomBtn extends LitElement {
        static get styles() {
          return [
            BsButtonDarkCss
          ];
        }

        render() {
          return html`
            <bs-button context="dark">Dark custom bootstrap button</bs-button>
          `;
        }
      }
      customElements.define('custom-button', CustomBtn);
    </script>
  </head>
  <body>
    <custom-button></custom-button>
  </body>
</html>
Run the server
npx es-dev-server --app-index heritage.html --watch --open
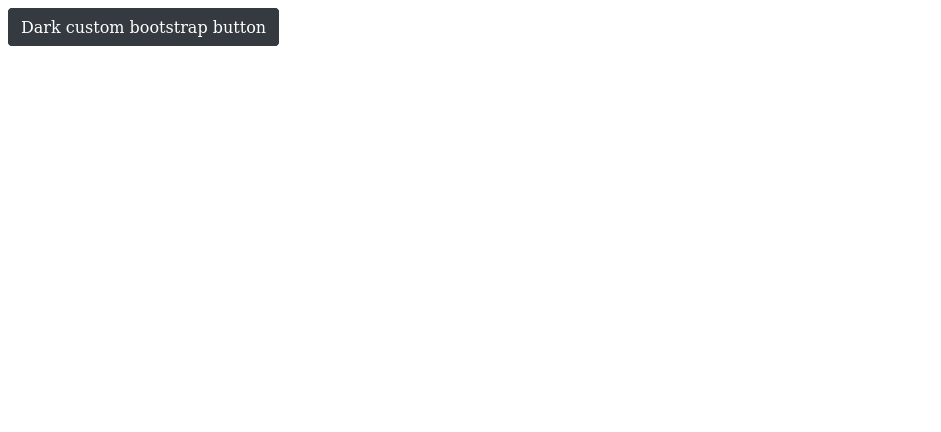
Boostrap style button installed with heritage
Conclusion
Import maps is a great proposal that enhances the development workflow and makes a bridge between the npm ecosystem and the browser, sadly is not all pretty, there is compatibility problems between the import system that uses the browser ESM and the one that nodejs used in the past commonJS, snowpack has provided a way to breach into this problem.
The one thing that I personally don’t Like about snowpack is that is that there will be duplication of code, the node_modules and web_modules folder are similar. I guess that’s the price to pay for a package manager that was not designed to work with the browser.
Heritage provides a morden way to install packages, it’s still a new technology so I dont expect it to be as robust and have the same features as the yarn package manager for example.
Additional notes
Check out the github source code repository with all the examples included!
Snowpack and the polyfill es-module-shim can do much more than the examples provided here. I encourage you to checkout their documentation.
You can check the progress of the import maps on chromestatus.com
Import maps can also be used with unpkg content delivery network. The bare syntax can be mapped to an unpkg url, Deno uses import maps to do something similar. You can even use unpkg urls as a fallback in case a module is not available in the node_modules folder.